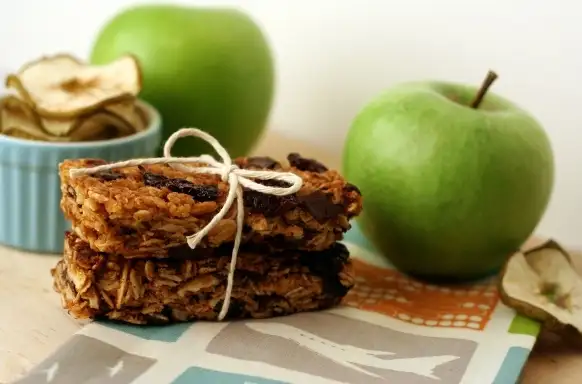
SmarterTravel’s Executive Editor Anne Banas is also an aspiring pastry chef who recently graduated from the Cambridge School of Culinary Arts in Cambridge, Massachusetts. In the following story, she’s combined her travel expertise with her cooking skills to develop a collection of delicious flight-friendly recipes.
You know the old saying, “If you want something done right, do it yourself.” This certainly applies when it comes to in-flight food. Leave your meal options up to airlines and airports and you’ll likely become victim to tasteless, overpriced fare. So why risk the disappointment and insult? Pack your own homemade snacks instead. Here are 10 easy-to-prepare (and TSA-friendly) recipes that will spice up your seatback tray table.
Image Gallery
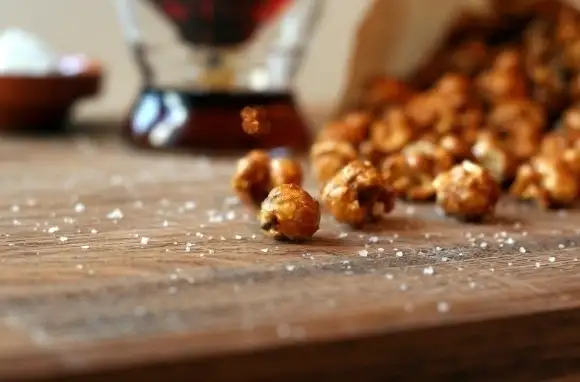
Sea-Salt Maple-Caramel Popcorn
Why It's Great for Travel: On a recent Virgin America flight, I purchased a small bag of caramel popcorn and found the sweet and salty kernels to be the perfect indulgence for a cross-country trip. However, I had to fork over several dollars. For just pennies a pop (pun intended), I've recreated the snack with maple syrup and sea salt. If you want to be especially decadent, use fleur de sel. No matter what, this popcorn is so satisfying (and addictive) that you'll forget you're flying in economy class.
Yield: About 12 to 13 cups
12 cups popcorn (already popped)
¼ cup coconut oil (or butter)
1 cup packed brown sugar
½ cup maple syrup
1 teaspoon sea salt
1 teaspoon vanilla
- Preheat oven to 250°F.
- Line a rimmed baking sheet with parchment paper.
- Place popcorn in a large bowl.
- Melt coconut oil in a small saucepan on low heat. Stir in brown sugar, maple syrup, and sea salt, and let it come to a boil (do not allow mixture to smoke). Remove from heat and stir in vanilla.
- Drizzle mixture over popcorn and fold to coat.
- Pour popcorn mixture onto baking sheet, spreading it into a single layer. Bake in oven for 15 minutes to set.
- Remove from oven and allow to cool completely, then break into small pieces.
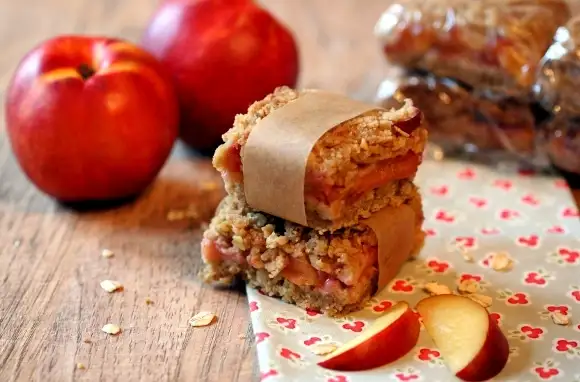
Stone-Fruit Oatmeal Square
Why It's Great for Travel: Filled with natural fruit flavors but not overly sweet, these oatmeal squares can serve as a quick afternoon snack or ready-to-go breakfast treat for an early-morning flight. Even better, they can be baked and frozen in advance so you won't have to scramble to prep right before you depart. Just take one or two out of the freezer as you head to the airport and allow them to thaw on your way. The recipe is also quite versatile. You can use any stone fruits, such as nectarines, peaches, or plums, making the squares especially ideal in summer (though pretty much any fruit, including apples and berries, can be substituted as the seasons change).
Yield: About 9 squares
3 medium nectarines or peaches (or 6 plums), sliced ⅛-inch thick
2 tablespoons granulated sugar
1 cup rolled oats
¾ cup light-brown sugar, lightly packed
1½ cups all-purpose flour
1 teaspoon baking powder
½ teaspoon cinnamon
¼ teaspoon nutmeg
¼ teaspoon salt
1½ sticks cold unsalted butter, cut into small pieces
1 egg
1 teaspoon vanilla extract
- Preheat oven to 375°F.
- Grease an 8 x 8-inch baking pan.
- In a small bowl, toss fruit slices with granulated sugar. Let sit for at least 15 minutes, then drain.
- In a large bowl, mix oats, brown sugar, flour, baking powder, cinnamon, nutmeg, and salt. Cut in butter with a pastry blender or a large fork, then stir in egg and vanilla.
- Firmly press half of the crumble mixture into pan. Set remainder aside.
- Layer fruit slices on top of crumble mixture in pan.
- Pour remaining crumble mixture on top of fruit slices and gently press down until even.
- Bake in oven for approximately 30 minutes, rotating pan after 15 minutes, until crumble is golden brown.
- Allow to cool, then cut into squares. Wrap tightly with plastic wrap, then freeze for later use.
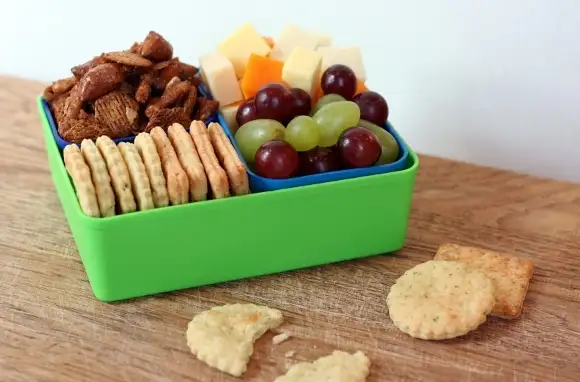
Cheese Bento Box
Why It's Great for Travel: Portable "bento boxes" are good for travel because they allow items to remain separate, even when jostled around inside a carry-on bag. This box comes packed with protein and a mix of flavor combinations and textures. Perhaps the best part is that you won't need utensils to enjoy it. I've included hard cheeses, which won't get overly soft or oily at room temperature, grapes for a touch of sweetness without any leaking juices, and homemade crackers for a little savory accompaniment. For added crunch, I've created a sweet-and-spicy snack mix with sesame sticks and mini pretzels substituted for nuts, since other passengers might have nut allergies or sensitivities.
(Box pictured is sold by Laptop Lunches.)
Yield: 4 bento boxes
Sweet-and-Spicy Snack Mix (see below)
Parmesan-Thyme Crackers (see below)
2 cups seedless grapes
1 cup cheese, cut into cubes*
*Use a mix of aged versions of harder cheeses like cheddar, Gouda, Swiss, or even Mimolette, a bright-orange French cheese similar to Edam.
Sweet-and-Spicy Snack Mix
Yield: About 2 cups
½ cup pretzel nuggets, preferably multigrain
½ cup sesame sticks
½ cup shredded cereal squares, such as Barbara's Shredded Spoonfuls
2 tablespoons sunflower seeds, roasted and unsalted
½ tablespoon butter
2 tablespoons light-brown sugar, lightly packed
1 tablespoon honey
¼ teaspoon cinnamon
⅛ teaspoon allspice
⅛ teaspoon cayenne pepper
⅛ teaspoon salt
- Preheat oven to 350°F.
- Line a rimmed baking sheet with parchment paper.
- In a large bowl, mix pretzel nuggets, sesame sticks, cereal, and sunflower seeds.
- In a small saucepan, melt butter, brown sugar, and honey; stir in spices.
- Pour honey mixture over snack mix and stir to coat.
- Spread mixture onto baking sheet and sprinkle with salt.
- Bake in oven for about 10 minutes to set, stirring the mixture after 5 minutes and rotating the pan.
- Allow to cool, then break into pieces.
Parmesan-Thyme Crackers
Yield: About 30 crackers
1 cup all-purpose flour
4 tablespoons butter, softened
¾ cup fresh Parmesan cheese, finely grated
1 teaspoon thyme, finely chopped
¼ cup milk
- Preheat oven to 350°F.
- Line a baking sheet with parchment paper.
- Pulse flour and butter in a food processor until it has the consistency of cornmeal.
- Mix in Parmesan and thyme, then slowly add milk, pulsing until dough comes together. (Dough won't form a ball, but will stick together when pressed with your fingers.)
- Turn out onto a lightly floured surface, then roll out with a rolling pin until about ⅛-inch thick.
- Prick dough evenly with a fork, making sure to pierce all the way through so crackers won't puff up.
- Cut into shapes using round or square 2-inch cutters, or make cuts with a sharp knife.
- Bake for 10 minutes, then rotate pan. Continue baking for another 10 minutes or until golden brown.
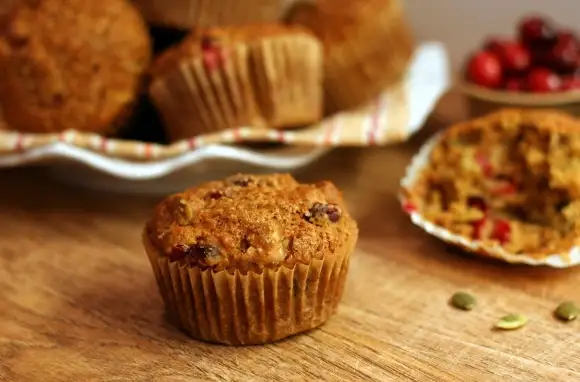
Orange-Cranberry "Red-Eye" Muffin
Why It's Great for Travel: Many experts advise that after a red-eye flight you should fight the urge to nap, and instead try to get on with your day. To keep you going, I've designed an energy-packed muffin loaded with nutrients and flavor. Ingredients include orange juice for vitamin C, antioxidant-rich cranberries, protein- and magnesium-filled pumpkin seeds, and whole-wheat flour and bran for energy-boosting carbs. Plus, these muffins are practically guilt-free since they are low in sugar and fat.
Yield: 12 muffins
2 teaspoons orange zest (from about 2 large oranges)
1 cup freshly squeezed orange juice (from same oranges)
½ cup wheat bran
1 cup all-purpose flour
½ cup whole-wheat flour
1½ teaspoon baking soda
1 teaspoon baking powder
½ teaspoon salt
⅓ cup light-brown sugar, plus extra for muffin tops
¼ cup apple sauce
¼ cup canola oil
1 teaspoon vanilla
1 cup fresh or frozen cranberries, roughly chopped*
¼ cup pumpkin seeds, shelled
*If using dried cranberries, be sure to hydrate them with hot water (then drain) before using.
- Preheat oven to 400°F.
- Prepare a muffin pan with paper liners.
- Zest both oranges, then squeeze out juice. Reserve 1 cup of juice and 2 teaspoons of zest and set aside.
- In a large bowl, mix wheat bran, all-purpose flour, whole-wheat flour, baking soda, baking powder, salt, and brown sugar.
- In a separate bowl, whisk reserved orange juice, apple sauce, canola oil, and vanilla.
- Gently mix wet ingredients into dry, then fold in orange zest, cranberries, and pumpkin seeds. Do not overmix.
- Using a ¼-cup scoop or measuring cup, portion out batter into muffin pan. Sprinkle a little brown sugar on top of each muffin.
- Bake in oven for 20 minutes, rotating pan after 10 minutes. Muffins are done when a toothpick inserted in the center comes out clean.
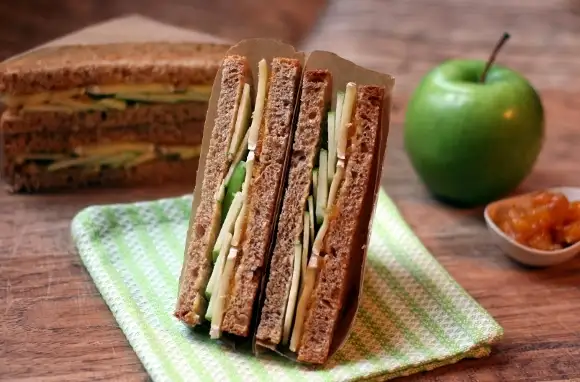
Apple and Brie Sandwich
Why It's Great for Travel: Like the triangular sandwiches you find in British food halls such as Marks and Spencer, trendy takeaway food joints like Eat., and even gas stations, this version with Brie and apple is super convenient, just as portable, and undoubtedly fresher. The secret is using butter as a moisture barrier to prevent the sandwich from getting soggy (and to bring out the butteriness of the Brie). It's best to use whole-grain bread, which tends to be firmer and less spongy than white. And by wrapping the sandwiches in wax or parchment paper instead of plastic, air will be able to circulate, preventing moisture from getting trapped and leaving you with mush by the time your flight departs. This sandwich is delicious on its own but I like to add sweet apricot-ginger chutney to dress it up for a trip.
Yield: 4 sandwiches
2 Granny Smith apples
1 tablespoon lemon juice
6-ounce wedge of Brie
2 tablespoons butter, softened
8 slices whole-grain bread
¼ cup Apricot-Ginger Chutney (see below)
- Core and thinly slice apples about ⅛-inch thick. Place apple slices in a medium-sized bowl, then sprinkle with lemon juice. Let drain on a clean lint-free towel.
- Cut Brie into ⅛-inch-thick slices.
- Spread butter evenly on one side of each slice of bread.
- On one slice of bread, butter side up, layer chutney (if using), Brie, and apple slices, and then top with another slice of bread, butter side down. Repeat for three remaining sandwiches.
Apricot-Ginger Chutney
Yield: About 1 cup
½ cup dried apricots
½ cup water
½ cup light-brown sugar
⅓ cup orange juice
2½ tablespoons cider vinegar
½ teaspoon fresh ginger, grated
¼ teaspoon salt
- Place apricots in a medium bowl.
- Bring water to a boil and pour over apricots; let sit 15 minutes, then drain and allow to cool. Finely chop apricots, then place inside a small saucepan.
- Add brown sugar, orange juice, cider vinegar, and grated ginger to the saucepan, then boil gently until thickened (about 10 to 15 minutes).
- Season with salt and allow to cool completely. Store in an airtight container in the fridge or freeze.
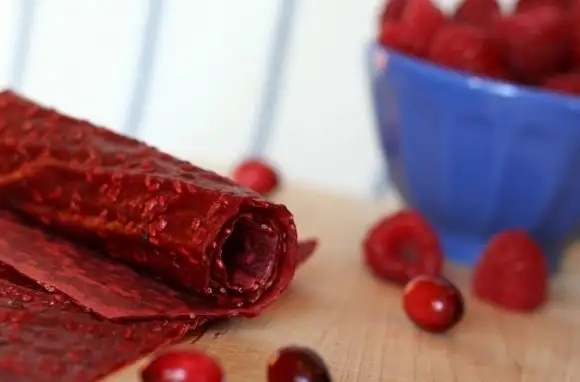
Cran-Raspberry Fruit Leather
Why It's Great for Travel: Dehydration is the best way to get all the benefits of fruit without the bulk, which is especially important when you have limited carry-on space. Prepare your fruit in "leather" form and it's not only convenient but also fun to eat. Sure, you can buy the commercial "roll-up" version, but nothing tastes the same as fresh fruit sans the preservatives. Plus, in this do-it-yourself variation, you can control the amount of sugar and upgrade the recipe to the "healthy" category of snacks.
Yield: 9 strips
1 cup cranberries
3 cups raspberries
½ cup water
¼ cup sugar
1 teaspoon lemon juice (optional)
- Preheat oven to 200°F.
- Line a rimmed baking sheet with a silicone mat or parchment paper.
- Run berries through a food mill, or puree them in a food processor and strain out seeds.
- In a saucepan, combine berry puree, water, sugar, and lemon juice (if using); simmer until thickened (about 10 to 15 minutes).
- Spread mixture onto baking sheet (about ⅛-inch thick) and cook for 2 to 3 hours, until set but still a bit tacky in the center. Allow to cool, then cut into 2-inch strips. If you want to roll them up, use strips of parchment paper as a backing.
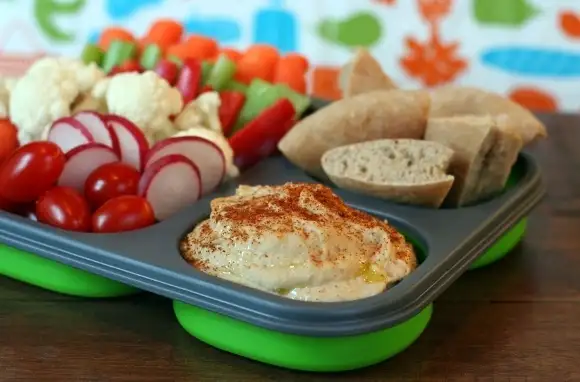
White-Bean Hummus Lunch Box
Why It's Great for Travel: Most airplane food tends to be salty, high in calories, and not very wholesome. Any vegetables you do find are usually limp and unappealing. The solution? BYOV (bring your own veggies) and eat them with flavorful white-bean hummus and whole-wheat pita bread. This hummus, with a hint of garlic and paprika, is a nice twist on the classic chickpea version. (If you don't want to risk any garlicky aftertaste on the airplane, use roasted garlic instead of fresh.) You can purchase whole-wheat pita or use my recipe below, which yields a hearty bread.
(Collapsible box pictured is sold by Smart Planet.)
Yield: 4 lunch boxes
White-Bean Hummus (see below)
Whole-Wheat Pita (see below)
1 red bell pepper, sliced into strips
2 celery stalks, sliced
1 cup carrots, sliced
1 cup grape tomatoes
1 cup cauliflower florets
8 small radishes, sliced
White-Bean Hummus
Yield: About 1⅓ cups
1 can (15 ounces) cannellini beans, drained and rinsed
¼ cup tahini paste
2 tablespoons freshly squeezed lemon juice
2 tablespoons extra-virgin olive oil
1 garlic clove, chopped
¼ teaspoon paprika
¼ teaspoon salt, plus more to taste
- Blend beans, tahini, lemon juice, olive oil, and chopped garlic in a food processor until smooth.
- Add paprika and season with salt.
Note: Hummus is considered a liquid/gel by the Transportation Security Administration (TSA). Be sure to portion out no more than 3.4 ounces per person if you are planning to take it through security.
Whole-Wheat Pita
Yield: 4 pitas
1 package (about 2¼ teaspoons) dry active yeast
1 cup warm water
1 teaspoon salt
1½ cups all-purpose flour
1 cup whole-wheat flour
1 teaspoon olive oil (optional)
- Preheat oven to 450°F.
- In a small bowl, dissolve yeast in warm water.
- In a large bowl, mix salt, all-purpose flour, and whole-wheat flour. Stir in yeast mixture and olive oil (if using), and continue stirring until a soft dough forms.
- Turn out dough onto a lightly floured surface (or place in a stand mixer fitted with a dough hook). Knead dough until smooth and elastic (about 8 minutes).
- Divide into four pieces and form each piece into a ball. Roll each ball into a circle (about 6 inches wide) and place on a nonstick baking sheet. Cover loosely with plastic wrap and let rise until doubled in size (about 45 minutes).
- Flip pitas over and bake for 5 to 10 minutes, until puffy and light brown.
- Allow to cool, then slice into triangles.
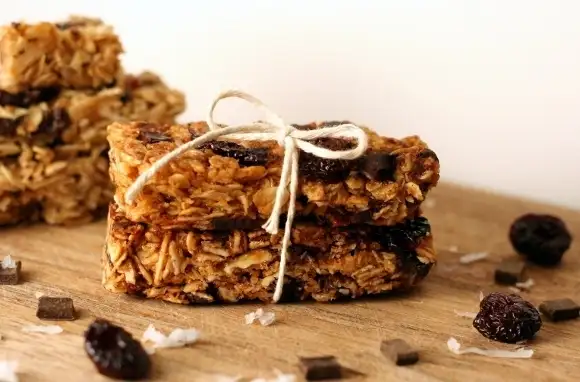
Coconut-Chocolate-Cherry Granola Bar
Why It's Great for Travel: Store-bought granola bars tend to be more like candy bars than health food, so it pays to be able to hand-pick your ingredients. In my from-scratch recipe, I've used mainly brown-rice syrup—which is relatively low on the glycemic index—as a sweetener instead of corn syrup. I've also added flaxseed and wheat germ for additional nutritional benefit. And since it's nut-free, it's extra plane friendly. The best part about these bars is that no actual baking is required—perfect for time-pressed travelers.
Yield: 15 to 18 bars
1 cup dried cherries
1 cup hot water
1 cup crispy brown-rice cereal
2 cups rolled oats
1 cup shredded coconut, preferably unsweetened
2 tablespoons flaxseed, ground
6 tablespoons wheat germ
¼ teaspoon salt
1 cup brown-rice syrup
¼ cup light-brown sugar
1 teaspoon vanilla
½ cup mini dark-chocolate chips
- Line bottom of a 9 x 13-inch baking pan with parchment paper.
- Place dried cherries in a small bowl and pour hot water over them. Let sit for 15 minutes. Drain cherries, then roughly chop and set aside.
- In a large bowl, mix rice cereal, oats, shredded coconut, ground flaxseed, wheat germ, and salt; set aside.
- In a small saucepan, combine brown-rice syrup and brown sugar. Bring to a boil (do not allow mixture to smoke). Take off heat and add vanilla. Fold into dry mixture, being very careful since syrup will be extremely hot. Cool slightly, then fold in cherries and chocolate chips.
- Press mixture evenly into prepared baking pan. Allow to cool in the refrigerator for at least two hours, then cut into bars while still cold.
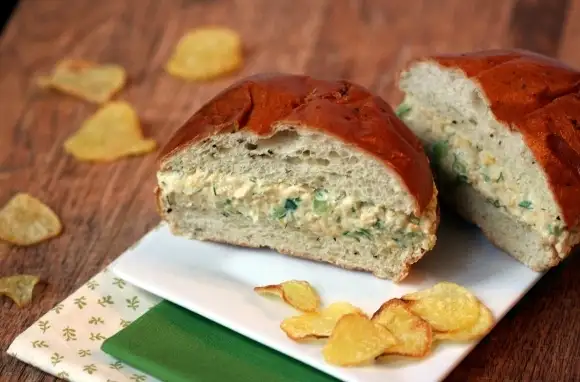
Chickpea-Salad Sandwich
Why It's Great for Travel: When it comes to bringing a sandwich on a plane, there are several considerations: Is it packable? Does it have a strong aroma that might offend other passengers? Will it be able to hold up for several hours (as you wade through security and check-in lines)? You can tick all the boxes with this sandwich, which is made with mashed chickpeas rather than tuna and Greek yogurt instead of mayonnaise. By using a sturdy roll, it'll tuck neatly inside a sandwich bag and be easy to eat with your hands. Note: It pairs perfectly with salt-and-vinegar potato chips.
Yield: 4 sandwiches
15-ounce can chickpeas, rinsed and drained
1 clove garlic, peeled and minced
2 scallions, chopped
1 stalk celery, chopped
1 tablespoon fresh dill, chopped
½ cup Greek yogurt
1 teaspoon olive oil
1 teaspoon lemon juice
Salt to taste
Black pepper to taste
4 sandwich rolls, such as brioche
- Place chickpeas in a bowl and lightly mash with a fork. Add remaining ingredients and mix until well combined.
- Slice rolls in half and divide chickpea salad evenly among rolls.
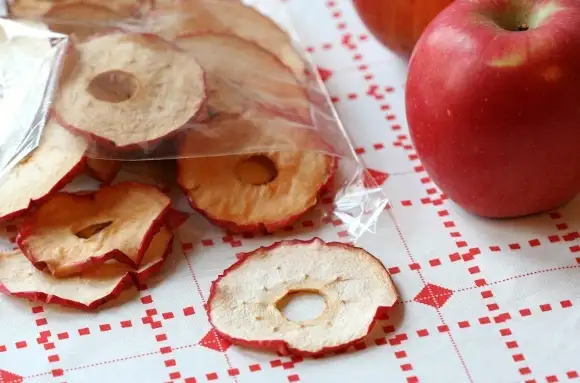
Oven-Dried Apple Chips
Why It's Great for Travel: Lightweight, fat-free, and filled with concentrated flavor, apple chips just might be the most virtuous airplane snack. Plus, they are a cinch to make. There is very little prep work, and while the apples take several hours to dry, you can spend the time doing other important things such as packing for your trip. Even better, you can make them months in advance; just store them in an airtight container once they are completely dried.
Yield: 30 to 40 chips
4 apples, cored and sliced into ¼-inch-thick rings
2 tablespoons lemon juice
- Preheat oven to 200°F.
- Line two baking sheets with parchment paper.
- Place apple slices in a bowl and sprinkle with lemon juice. Pat dry with a clean towel.
- Arrange apple slices on baking sheet and bake in oven for about 3 hours, until apples are dry. Allow to cool.
Tried any of these recipes? Please tell us about it in the comments below. I'm happy to help troubleshoot if you run into any issues.
More From Smartertravel:
We hand-pick everything we recommend and select items through testing and reviews. Some products are sent to us free of charge with no incentive to offer a favorable review. We offer our unbiased opinions and do not accept compensation to review products. All items are in stock and prices are accurate at the time of publication. If you buy something through our links, we may earn a commission.
Related
Top Fares From
Today's Top Travel Deals
Brought to you by ShermansTravel
Japan: 10-Night Kanazawa Tour, Incl. Kenrokuen...
smarTours - JNTO
 vacation
$4320+
Mediterranean Cruises w/Free Balcony Upgrade, Specialty...
Holland America Line
 cruise
$1399+
Ohio: Daily Car Rentals from Cincinnati
85OFF.com
 Car Rental
$19+


